Archive for Do it yourself

Maker Faire 2012 – Hong Kong

There will be a Maker Faire held on 11, August 2012.
I am so excited and happy to finally see a Maker Faire here in HK.

But just one point to the event administration:
You don’t expect everyone to have a Facebook account, it just make no sense to expect people do. (which I found that happens a lot here in HK, IMHO many people are just so poisoned with FB…)
If you would like to use the Facebook as a platform for the event, at least make the group public, that is just stupid for public not to be able to see that online without a FB account.

Anyway, really looking forward for the event!

Links
http://hkmakerfaire.wordpress.com/

Starts some Arduino developing

20120617-050001.jpg

It has been such a long time since I first notice the Arduino, I even obtain a board and some basic modules for such a long time. (A bit of another story goes with the board, but well, another story it is, let’s forget it by now)

But instead of really get my hands dirty with this baby, I hardly did much beyond basic samples….

Luckily I made up my mind lately to finally getting something done now….

Ok, I am sure I will have lots of fun with it, so stay tune.

MircoUSB AB Cable Pinout.

Just a note to me and anyone want it handy.

Pin Name Cable Color Description
1 VCC Red +5 VDC
2 D- White USB Data –
3 D+ Green USB Data +
4
5 GND Black Ground

MicroUSB ab jack from the Phone side.

MicroUSB ab jack from the Cable side.

References:
http://pinoutsguide.com/CellularPhones-Nokia/micro_usb_connector_pinout.shtml

My mod on the Tomy Bit Char-G


The Skyline GTR R34 from the front, base on a 47MHz AM band Tomy Bit Char-G.


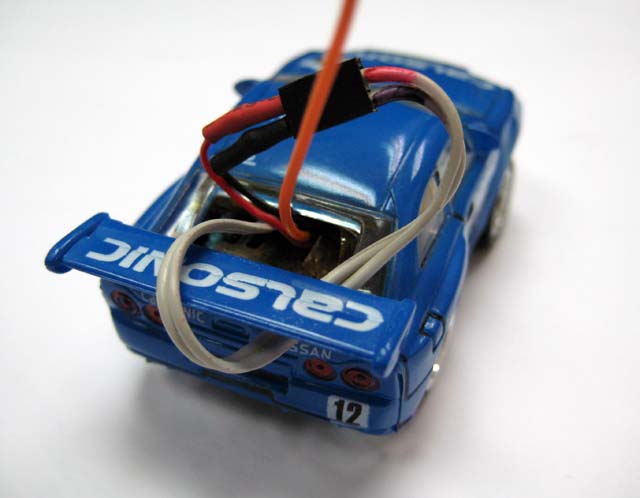
The Skyline GTR R34, from the back, the antenna was replaced with a better wire from a CAT5 Ethernet cable.


From the inside, notice the Lithium Polymer battery inside.
The BCG was originally powered at 1.5V Ni-MH battery at about 50mah, which is now replaced by 3.7V 190mah LiPo battery with a diode to drop 0.5V voltage, the actual design of the BCG can take up to 5V power, but as it was way too fast to run with 3.7V (it flips over all the time when turn), with approximately 3.2V it is now under reasonable control with some weights on the car and better control skills.

Not only greater power, the LiPo battery gives better run time as the discharge pattern LiPo is better than Ni-MH battery with same volume.
One more important reason for replacing the battery to LiPo is the Ni-MH will break and leak acidic liquid, which cause erosion on the PCB and parts, this is one of the main reason most of old BCG stop working.


This is the simple plug for the battery I made, quite easy to do, it is made from pins and plugs found in my old computer parts (IDE pins and case panel plug).


The charging station, it is actually from an older Nokia battery charger, instead of powered by the Nokia power adapter, it is now powered by USB with a 5.2V inverter, I simply open it up, wire the pins out, when charging, the blue LED with flash from left to right.


Blue LED all on when fully charge, LiPo battery protection board was placed on the battery so it won’t over discharge (will not give current when voltage of the battery itself is lower than 3.4V), normal run time of the BCG is approximate 15~20mins with good power. (compare to 2 minutes the Ni-MH battery gave)
Charge time is longer than the Ni-MH battery as over-charge (providing more voltage and current than it was design) is not an option in LiPo battery, it WILL damage the battery and get danger with over-charge, normally a full charge from empty would take 6~8 minutes.

What else?
Some of the mod. was not visible from the photo, example:
– Dual-spring were used in the steering part, which give better centering in the steering as we have way more power in speed now.
– The steering magnet was replaced by industrial use magnet, which gives way more power in steering (at least 2 times stronger than the original).
– Weights were placed inside the body where the Ni-MH used to be to give more stability to the car.

I planed some other hacks on the hardware side too, example:
– Bright white LED in head lights, with optical fibre to the back tail light.
– An Aluminum base cover, to protect chassis from dust dirt, and give better center of gravity as the c.g. is now very high due to the battery position.
– Complete re-design on the base chassis, with better center of gravity, better handle on the motor to gear (now it is very loose and lots of power was wasted) and lighter.
– Some body case mod.
– A BCG main board in a Q-Steer mini RC-Car.

And on the software side, a few very funny application was planned too, but seems it is a bit too early to mention by now, so stay tune.

DIY Wii Sensor Bar!!


A Clever maker Brian “DoctaBu” Moore has discover that the mystery Wii Sensor Bar was actually nothing more than a simply device sending IR signal to the Wiimote by appox 10 IR LEDs, no actual signal or data is send to the Wii console itself, so he made a home made wireless version of the sensor bar with only 4 LEDs and powerd them by 4 AA batteries!

Great work there!! I think it would be cool to DIY one if I get a Wii too!!!!
šŸ™‚

Links:
MAKE:Blog – HOW TO – Make your own wireless Wii sensor bar!
Brian “DoctaBu” Moore – The Homemade Wireless Wii Sensor Bar!

Zodiac Connector Pinouts

Just in case anyone interested, here is the pinout assignment for the Tapwave Zodiac.

Zodiac 1, Zodiac 2 Hotsync Connector ā€“ Custom 17 Pin Connector

Signal Name Type Pin Description
Gnd I 1 Ground
DC_In I 2 DC Input. 5.0VĀ±5% @ 1.1A max. Used for charging.
USB_D+ B 3 USB D+
USB_D- B 4 USB D-
VBUS I 5 USB VBUS. USB Detect
HS_Int I 6 HotSync Interrupt (i.e. HotSync Button)
RXD I 7 Receive Data (CMOS level), Serial Line
Vcc O 8 Peripheral Supply Voltage Vcc (also used for HS_Int) 3.0-3.3V @ 100mA maximum.
TXD O 9 Transmit Data (CMOS level), Serial Line
ID I 10 Peripheral ID: A peripheral must tie this to a 1% resistor to ground. A total of 6 peripheral types are supported. Also generates an interrupt when connected.
USB Travel Cable: Shorted
Keyboard: 2.00K
Mfg. Test Cradle: 5.0K
RxTx Travel Cable: 10.0K
USB Peripheral: 20.0K
RxTx Peripheral: 50.0K
Undocked: Open
DockConnect I 11 Dock Connect (connects to ground on travel
RTS O 12 Request to Send (CMOS level), Serial Line
CTS I 13 Clear to Send (CMOS level), Serial Line
Reserved B 14 Reserved
Reserved B 15 Reserved
Reserved B 16 Reserved
Gnd I 17 Ground


Special thanks to andyakadum in Tapland forum for the HDK